Create a database
Now we'll create a database and use it to show off essential database actions and features. You'll get to play with database properties, views, filters, and sorts - let's get into it 📈
Add a new page and select
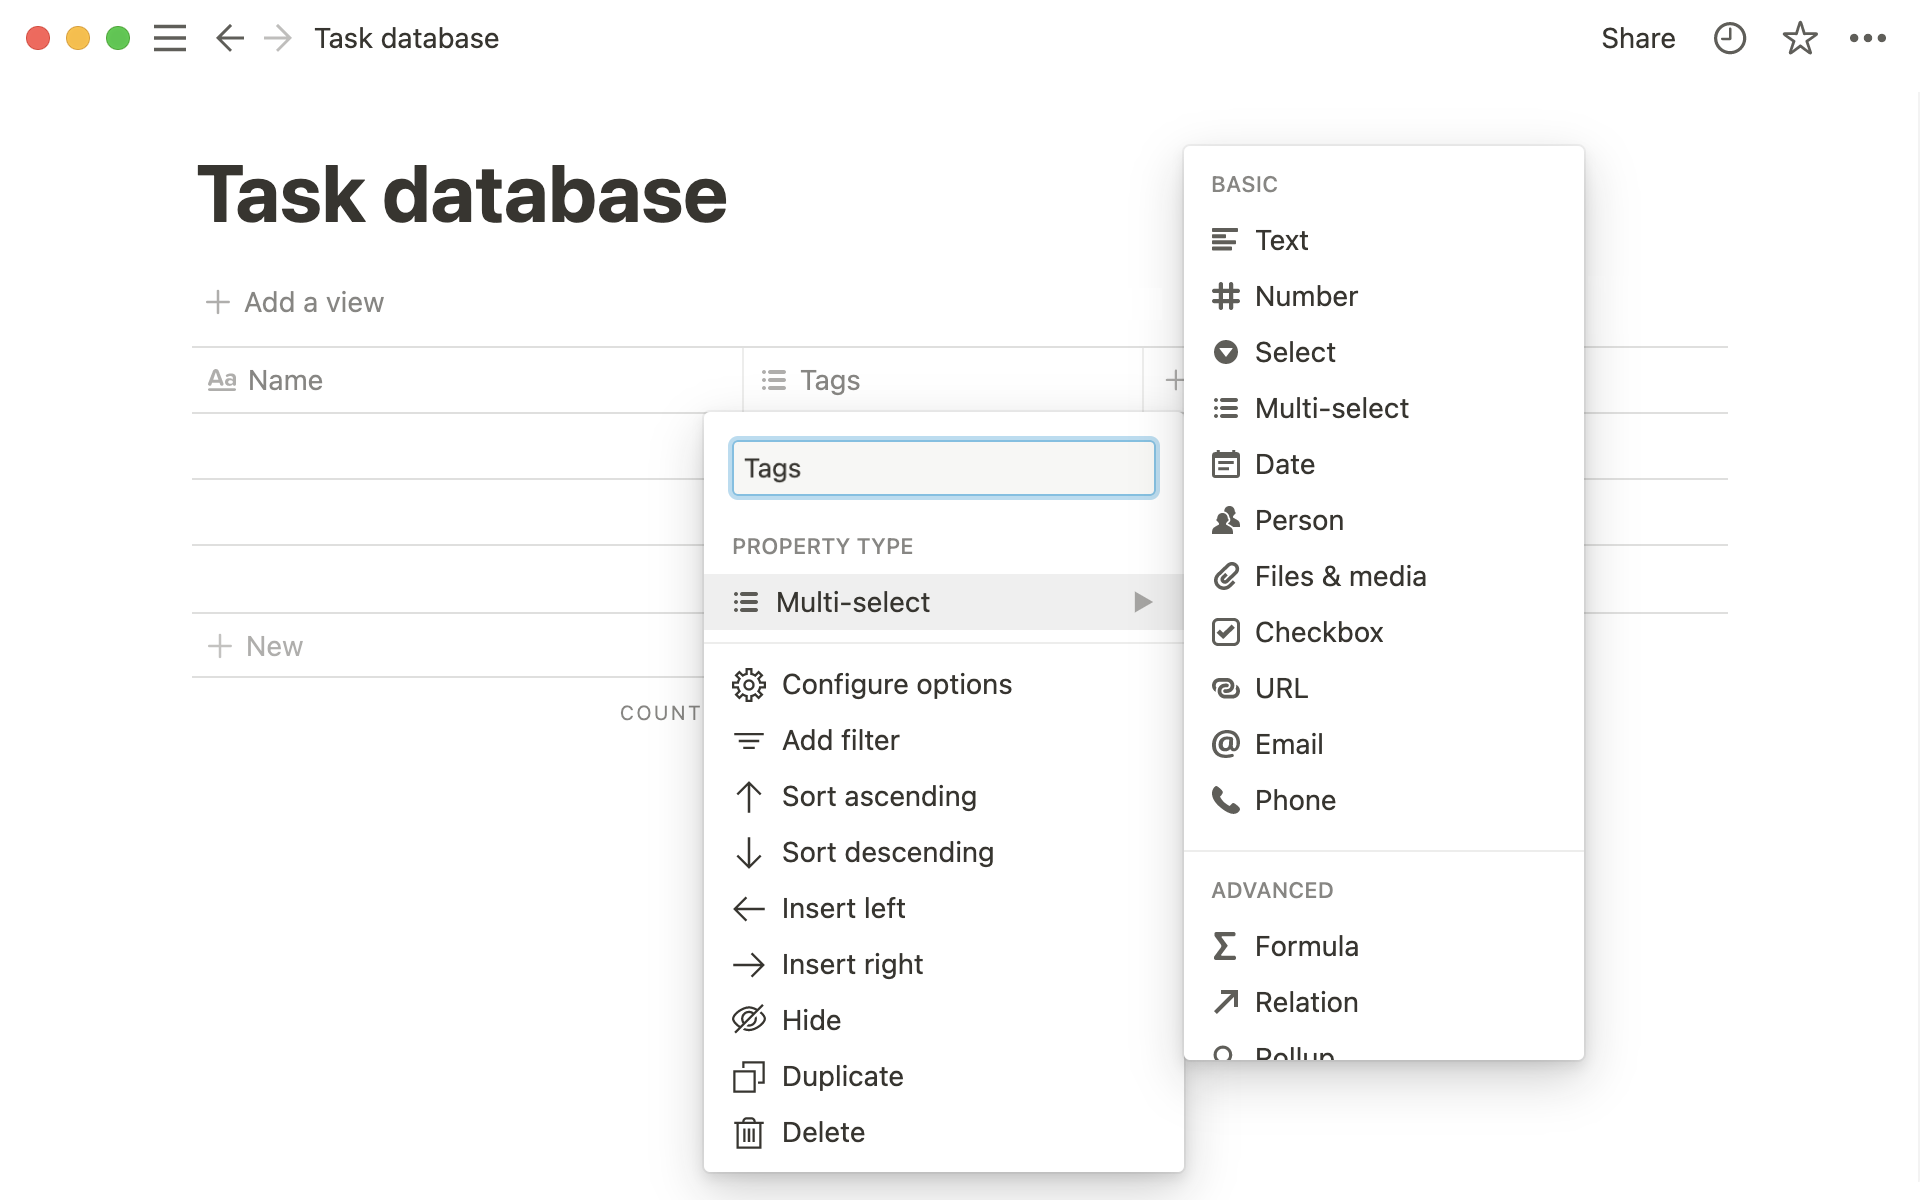
Table.The first column is where you enter the name of your database pages. Each column in a Notion table corresponds to a property that gives your item context.
Click a property heading, then the menu under
Property typeto see all of your property choices.

For this example, we'll create a task database.
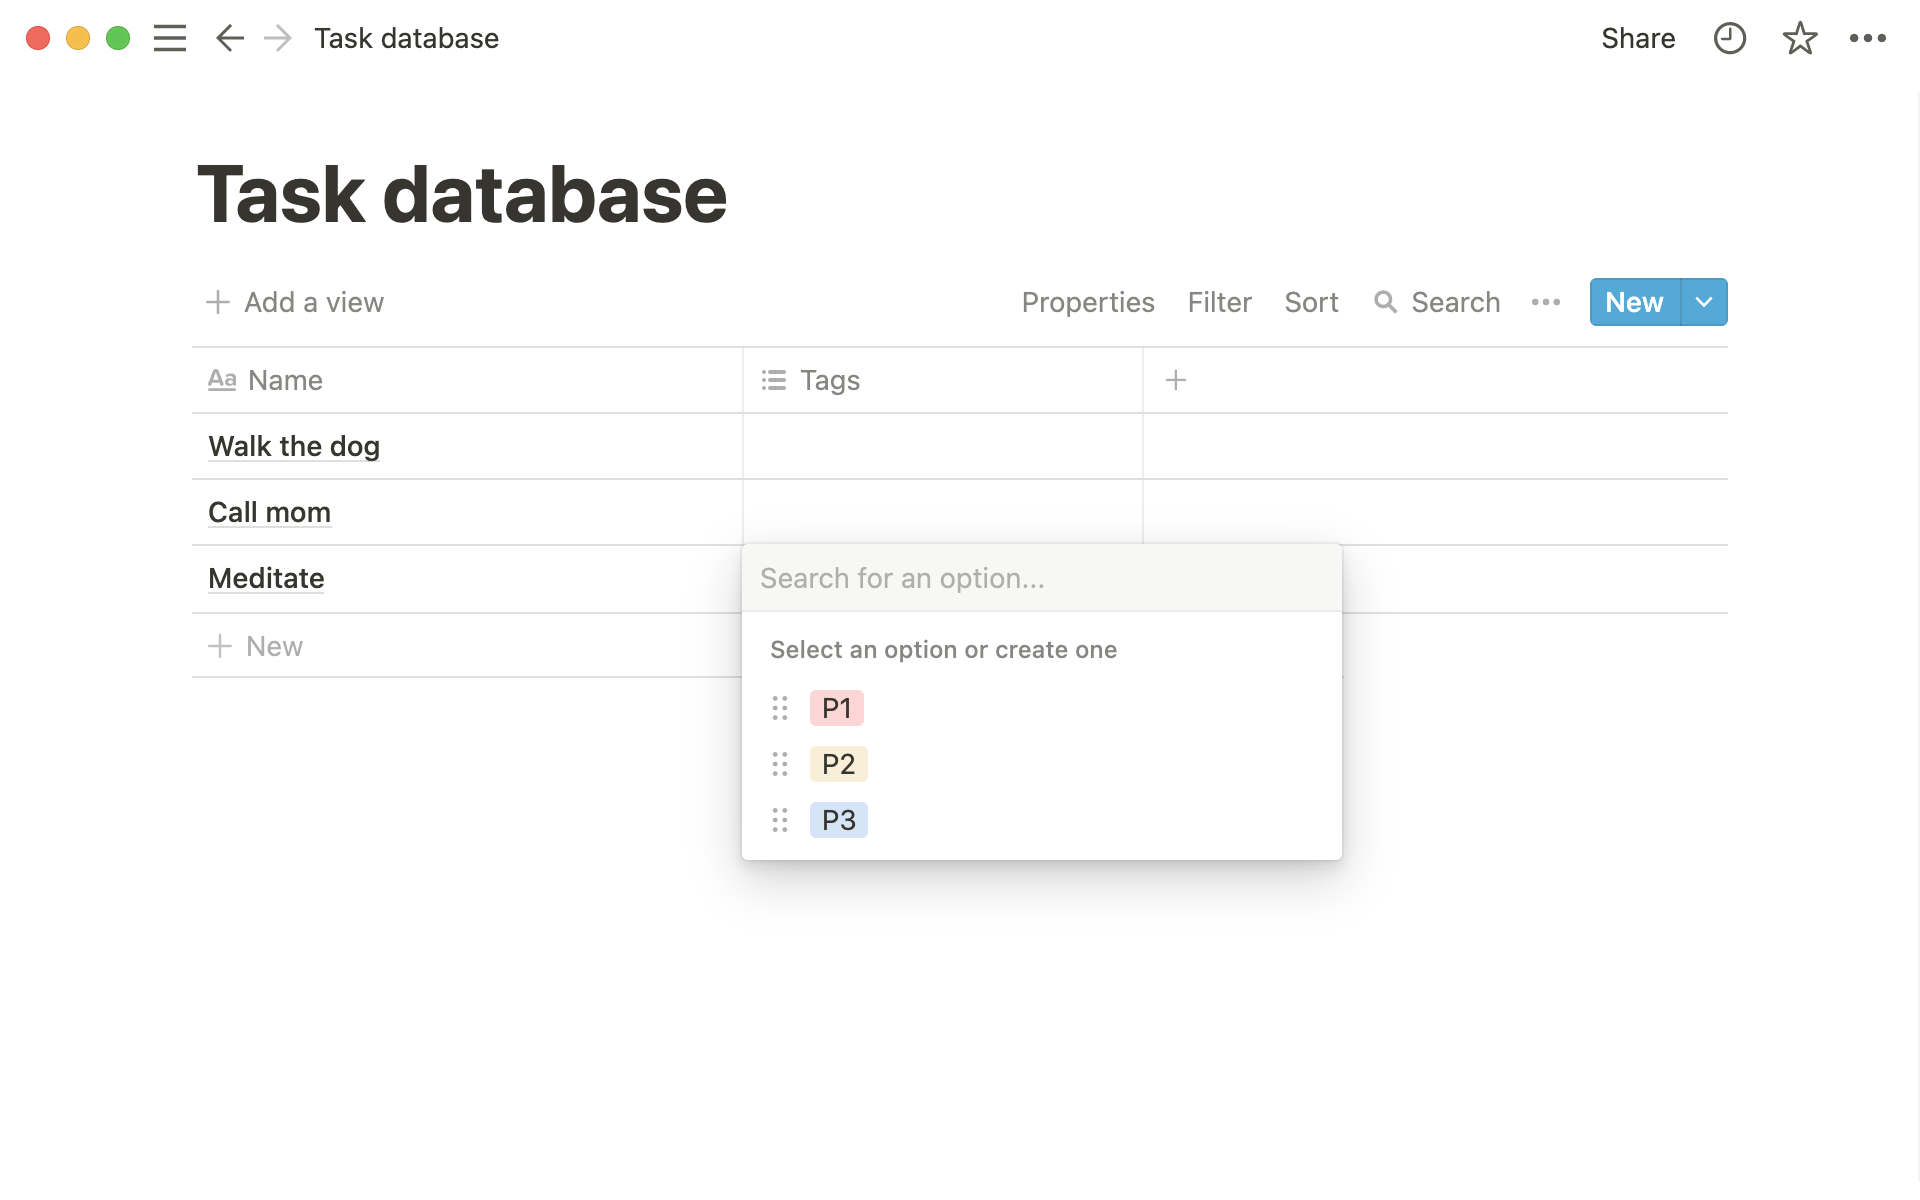
Add some tasks you're working on in the
Namecolumn.Now add some values to the
Tagscolumn using the multi-select property. Suggestion:P1,P2andP3to indicate priority of the task.

Add a new property using the
+button to the right of theTagsheading.Change its name to
Due Date. And underProperty type, selectDatefrom the menu. Now when you click on a cell underDue Date, you'll see the date picker.
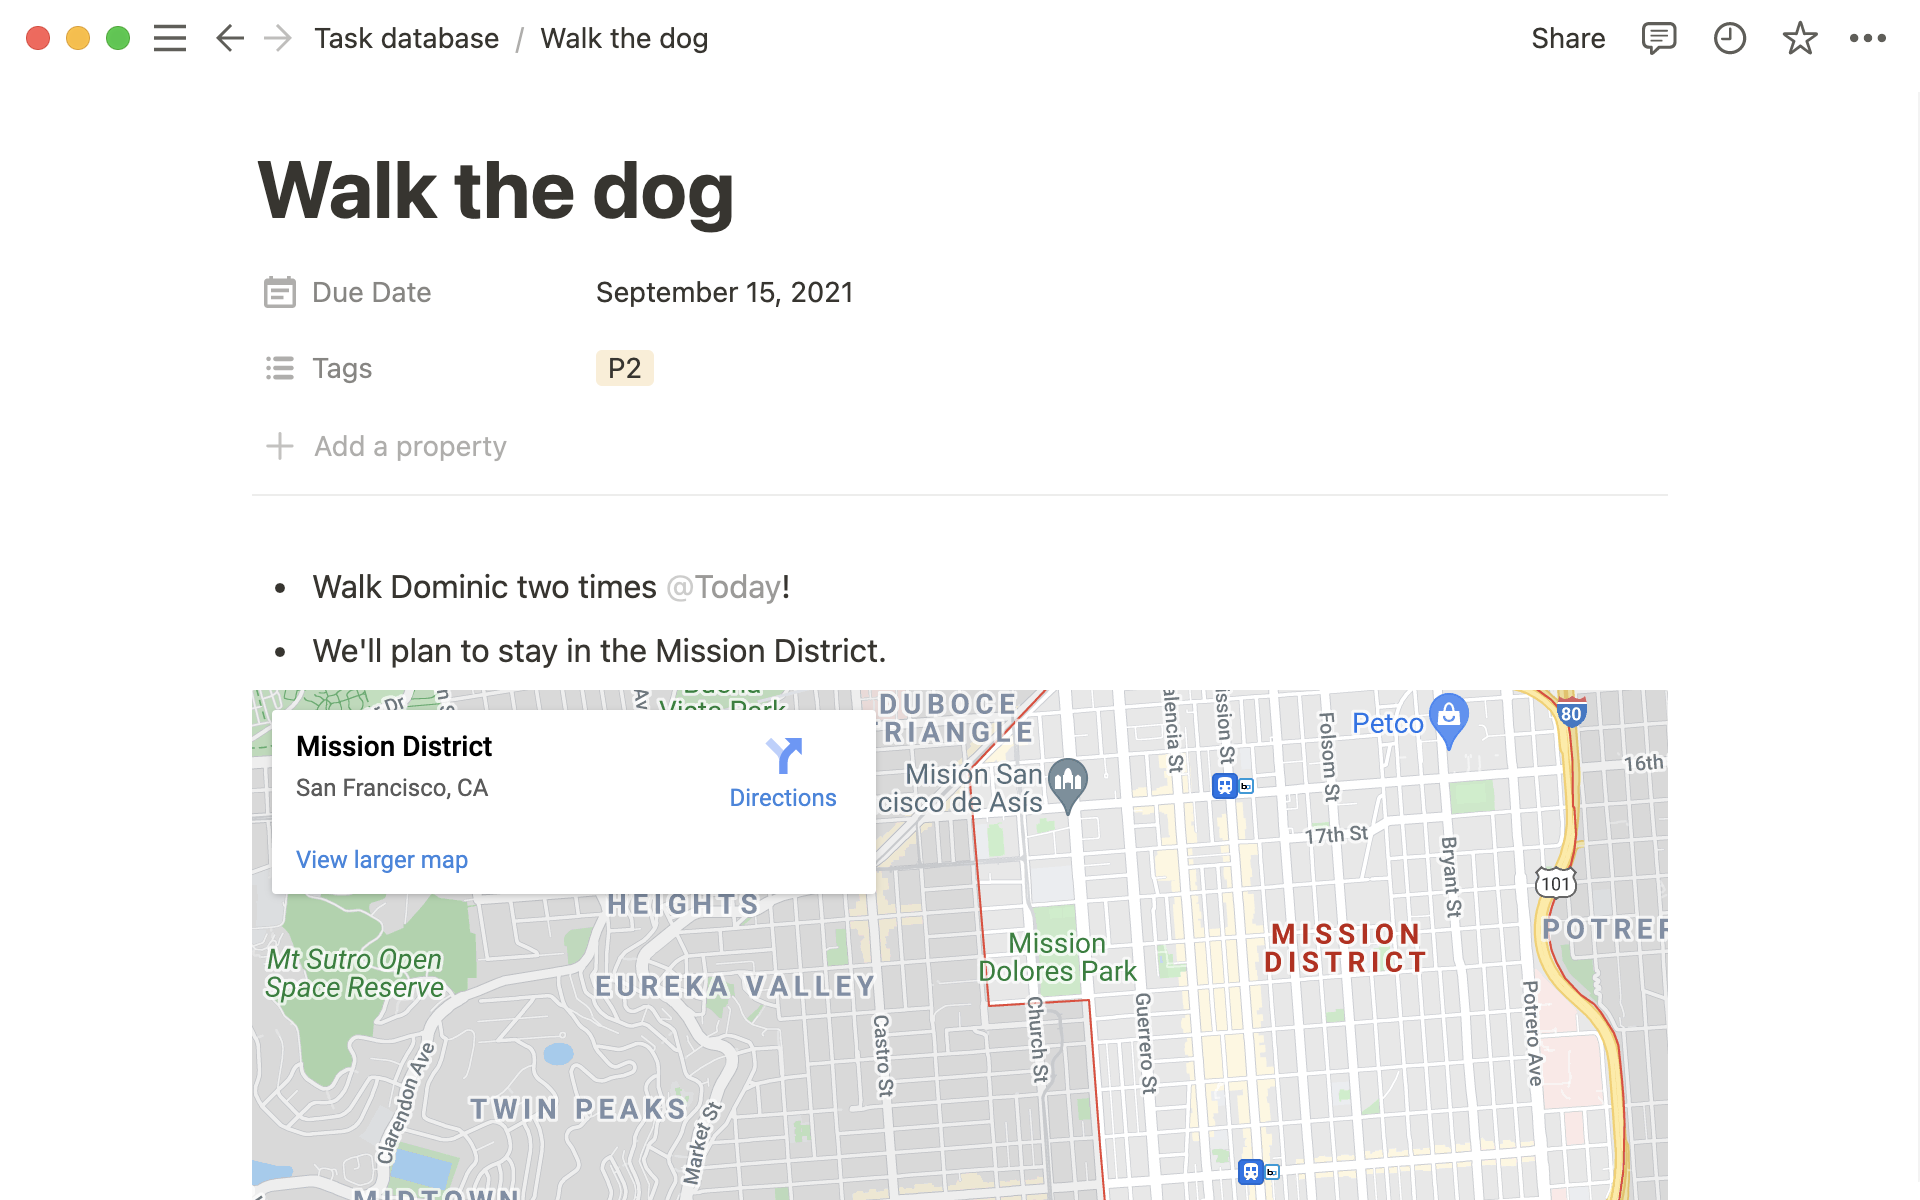
Every item in a Notion database is also a whole page of its own! You can add any content you want inside, including other databases.
In our task database example, this would let you keep all notes and content related to a task neatly bundled inside that task.
To open a row as a page, hover over a cell in the
Namecolumn and clickOPEN. It will look like this:
You can add or edit any properties. And you can add additional content into the body of the page, such details for the task:

You can create different views of the same data. Put it into a board, a calendar, a list, a gallery, or a timeline — depending on your needs. Let's try one.
Click
+at the top left of your table.Give your new view a name and choose
Boardfrom the right-side menu.This displays rows from your table into cards on a board, grouped by tag. Clicking on a card still opens it as a page. It's all the same content, just visualized in a different way!
Tip: Different views are good for different things, and you can have as many as you need!
Gallery view is great if you're storing images in your database.
Lists are helpful for minimalist storage of documentation.
Calendar view displays your pages by an assigned date property.
Timelines are useful for visualizing project dates and length.
Filter by property to focus on specific parts of your database.
Click
Filterat the top of your table, then select one of the default options or+ Add advanced filter.Then select the criteria that needs to be met.
The middle dropdown will give you different options depending on the property.
In this case, let's choose
Tagsas the property, and say it must containP1.
Add sorts to reorder your database depending on property values. Sorts are helpful for quickly ordering your data by priority, date, tags, etc.
Click
Sortat the top of your table, then select the property you'd like to sort by.For example, choose
Due Dateand thenAscending. This reorders tasks from closest to furthest due date.
You'll see your database change in real time based on your filter and sort criteria. You can add as many filters and sorts as you want, and each view has its own filter and sorts.
